Over the past several weeks, I have been working on recreating one of Henri Matisse's still life paintings using Photoshop, and today I have finished this picture. It has turned out pretty good, at least in my opinion, and now I'am going to explain to you, my readers, how I made this picture and how I have completed it. So here we go.
 |
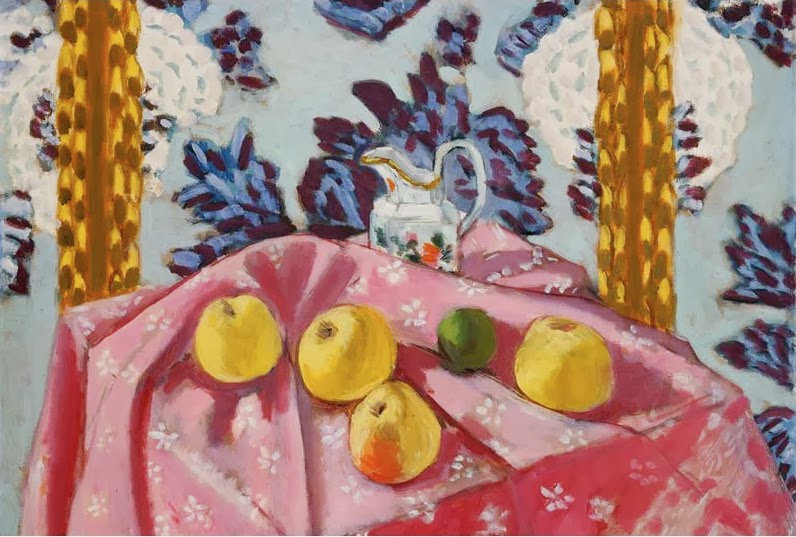
| Still Life with Apples on a Pink Tablecloth (1924) |
First I had to look for a picture on Google Images of one of Matisse's still life paintings. I found a few of them, and I decided to choose this one, and then I had to save into my file.
Later on I would take another search on Google Images, and I picked a random picture of a yellow apple to go with the picture. I also this saved into my file.
Then I took a screenshot of one of the apples in Matisse's original painting.
Next I opened up a new layer, and painted over the apple image using one of the brush tool, just so that I could give it the effect of me actually painting the picture by hand.(or at least my attempt at giving it that effect.)
I copied, scaled, and pasted the apple into a different file were the main picture was going to be. I duplicated the apple, and made 3 more apples, I adjusted the colour slightly by using Hue/Saturation tools under Edit and Adjust, and pasted them where the other apples are positioned in the original painting.
I also modified one of the apples by adding in more colour, using the paint tools again, just so that I could make this apple look like the apple with the orange tints from the original painting. Then I pasted the apple into the picture, along with all the other apples.

Soon I had to add and recreate the green apple by looking for a random picture of a green apple, by looking through Google Images again.
After opening up another new layer, I used the brush tool once again to paint over the apple.
And as soon as I had copied, scaled and pasted the green apple painting onto the main picture, I would have to make a few adjustments by using the eraser and brush tools, so that the apple would fit in a bit more with the other apples, because otherwise, the apple would look really strange.
For the wallpaper background, I would yet again use Google Images to look for a background for the painting, to be closely be similar to the wallpaper in the painting.
Because the Image that I had found was red, I had to use Hue/Saturation to change colour of the wallpaper into a light shade of blue.
I then had another layer opened and used brush tools again to paint over the picture in blue. I then lower the pictures opacity so that I could concentrate on painting the flower patterns on the wallpaper.
In between recreating the wallpaper and the apples, I had to open a new layer to paint in front of the original painting, so that I could make the table cloth from the original. I had toned down the opacity and used the brush tools to paint over table to get as much detail as much as I could, and give it the painted look of Matisse's original work.
I went on Google Images again to look for an image of a water jug to use as a substitute for the jug in the painting. I dragged out the image into the desktop, opened it up on Photoshop, and added another layer, so that I could paint into it.
I painted the jug using the brush tool, added shading like I did with the other paintings, opened up another layer to add in some decorations of my own, rather unmanly design, and combined the layers so that I could copy, scale and paste the final picture into the recreated painting.
Later on I would tone down the opacity of the painting, copy, scale and paste the water jug file into the picture, and used the eraser tools to rub out the bottom of the jug so that it would fit in nicely with the rest of the painting.
 |
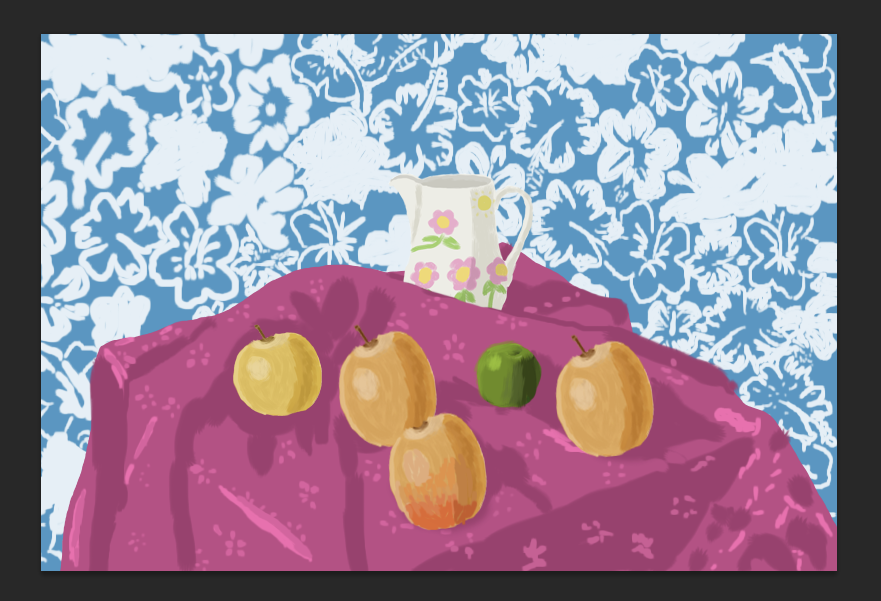
Henri Matisse's Still with Apples on a Pink Tablecloth
recreated by Aidan Fitzpatrick (2013) |
And at last, here's the final picture, I hope you enjoy looking at this picture, because even though it took several weeks to make and it was a lot of hard work, I'am nonetheless proud of how the final product came out. So see you all later in my next post, and have yourselves a Merry Cherry Christmas and A Happy New Year.


